 中文简体
中文简体 English
 русский
Don't hesitate to send a message
I. Introduction: Solving the "Impossible" Task The phrase "fitting a square peg into a round hole" is a universal symbol...
READ MOREContent
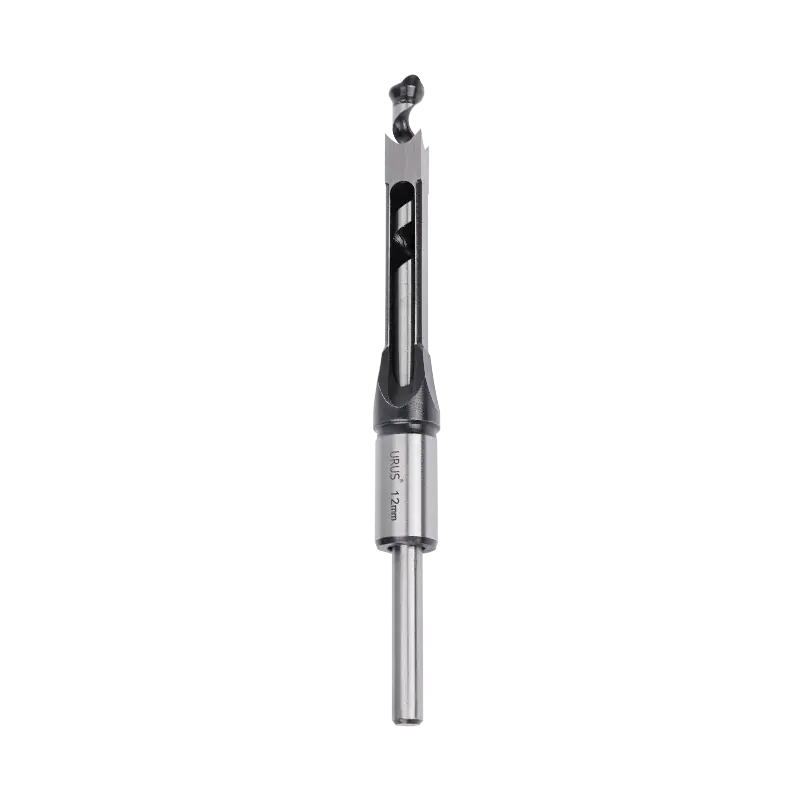
A wood auger drill is a helical boring tool designed to cut clean, deep holes through timber, lumber, and engineered wood products. Unlike standard twist bits that grind their way through material, an auger operates by pulling itself into the wood with a threaded tip—often called a feed screw—while the flighted body evacuates chips upward out of the hole. The result is faster penetration, less heat buildup, and far cleaner hole walls than conventional bits produce.
Augers are the go-to choice when depth matters. Standard twist bits struggle once they exceed twice the diameter in depth; augers routinely bore holes 12 to 36 inches deep in a single pass, making them indispensable for post setting, beam drilling, electrical and plumbing rough-ins, and mortise work in heavy timber framing.
Auger bits are not one-size-fits-all. The geometry of the flute, lip, and spur varies significantly depending on the target diameter, wood species, and end use.
| Auger Type | Diameter Range | Typical Use | Best For |
|---|---|---|---|
| Jennings Pattern | ¼″ – 1½″ | Hand brace, slow-speed drill | Precision joinery, furniture |
| Solid Centre | ½″ – 2″ | Power drill, timber framing | Green or knotty lumber |
| Electrician's / Ship | ¾″ – 1½″ | Worm-drive or right-angle drill | Wire and pipe runs through framing |
| Earth / Post-Hole | 4″ – 12″ | Gas-powered or tractor-mount | Fence posts, deck footings |
Jennings pattern bits feature a double-twist helix and two spurs that score the wood fibre ahead of the cutters, delivering exceptionally clean entry and exit holes—ideal for visible joinery. Solid-centre bits sacrifice some chip clearance for rigidity, making them far more durable when boring through mixed-grain, reclaimed, or nail-embedded timber. Electrician's augers are long (typically 17–24 inches), slender, and optimised for speed rather than finish quality, since the hole will be hidden inside a wall cavity.
The shank is the interface between the bit and your drill, and choosing the wrong one wastes torque and risks slippage under load.
A key variable is drill speed (RPM). Augers are low-speed tools: most manufacturers recommend 250–600 RPM for bits under 1 inch, dropping to 150–300 RPM for bits above 1½ inches. Running too fast generates friction that scorches wood fibres and dulls the cutting edges prematurely; too slow with insufficient feed pressure causes the feed screw to spin without biting.
An auger bit has three distinct cutting zones—the feed screw, the spurs (outer cutters), and the lips (bottom cutters)—and each requires a different approach to sharpening.
The spurs are best sharpened on the inside face only, using a slim round file or an auger file with a tapered profile. Filing the outside face alters the spur diameter and will cause the bit to bore undersized holes. The lips are filed flat on the upper face at the original bevel angle, typically 30–45°. Removing equal material from both lips keeps the bit centred; uneven lips cause the bit to wander off-axis. The feed screw rarely needs attention but can be lightly dressed with a triangular needle file if threads are damaged.
After sharpening, wipe bits with a light machine oil or paste wax before storage. Carbon-steel bits will rust in humid environments within days if left unprotected; high-speed steel (HSS) is more corrosion-resistant but still benefits from a protective film. Storing bits in a roll-up canvas pouch or individual slots in a bit index prevents spur-to-spur contact that chips the finely-honed cutting edges.
Auger bits generate significant torque, particularly as the hole deepens and chips compact around the flute. Respecting that torque is the foundation of safe operation.
When boring at an angle—common in timber framing for drawbore pegging or angled tenons—establish the entry angle before the feed screw engages. Once the screw bites, it dictates the trajectory; correcting an off-angle entry after that point damages both the bit and the workpiece.
I. Introduction: Solving the "Impossible" Task The phrase "fitting a square peg into a round hole" is a universal symbol...
READ MOREMetalworking has always been a cornerstone of industrial development, shaping everything from automotive components to a...
READ MORE1. What Are Waterpump Pliers? – The Flexible “All-Rounder” Tool In modern industrial manufacturing and daily maintenance...
READ MORESelecting the appropriate industrial cutting tools is a critical decision that directly impacts manufacturing efficiency...
READ MORE+86-573-84611229
+86-573-84611518
NO.35 Yucao Road, Ganyao Town, Jiashan City, Zhejiang Province, China
